Plant care – Page 2 – Sticks & Stones

Archive

Category Archives for "Plant care"

When in doubt, get a rock!

rock

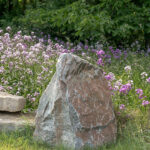
A recent article by my coworker Matt reminded me of this old saying. It’s born of the experiences of many rock and perennial gardeners. Throughout the years gardeners have collected and experimented with plants, looking for ways to use plants not necessarily accustomed to their soil type or zone. Their answer, in part, was raised rock gardens. Not only aesthetically pleasing, this approach created mini-climates in small spaces much in the same way mountain ranges create dramatic changes in flora from ridge to ridge. Lush forests give way to arid deserts on opposing side of the same mountains.

mountain
rock with salvia

Rocks and raised beds give plants good drainage. Many perennials in the North die, not from cold, but from excessively wet ground conditions. Perennials such as Dianthus, Lavandula, Gaura, Thymus, et al. thrive in their first plantings only to rot during their juvenile winters. Perennials with long tap-like roots such as Lupines, Hollyhock, Foxglove to name a few die from crown rot due to excessive surface moisture. The fence post problem – solid above and below the ground but rots off right at ground level.

rock with allium

Ground-covering plants like Sedums, Ajugas, Thymus run along filling the crevices, encouraged by the cool, moist conditions. The seed of many annuals and perennials find some of these same places to spend their first winter, where they experience death and rebirth in the stratifying process. A true, natural nursery.

thyme
woodland garden

Rocks help ease the stress of extreme temperature change. In the summer they create cool, moist conditions on their down side. In the winter they warm with the sun, giving roots some protection against the cold. Gardeners were often able to include plants that were a zone less hardy. This also works for woody ornamentals that are usually considered sub-shrubs such as Buddleia, Caryopteris, Callicarpa, Hypericum, Crape Myrtle, and more. These types of woodies experience varying degrees of dieback but recover well from roots and heavier wood. Even just tucking hand-sized rocks around the base of perennials and shrubs can give protection and anchor the late-planted.

callicarpa
fern and rocks

So when it comes to planting, if you’re ever in doubt, just go get one.

Jeff Good

Photos © Holly Christensen, except mountain scene (Storyblocks)
For a few lousy boxwood…

Rice Krispies

During the COVID-19 shutdown this spring, I was sitting on my porch on what was to be a beautiful day. It was early, and therefore quiet, and I heard a sound coming from my boxwood. I leaned in and distinctly heard what sounded like Rice Krispies in milk. Perplexed, I asked Google what was going on, and Google said, "leaf miners are eating the centers of your boxwood’s leaves". They were making quite a racket. They are either noisy eaters, or there were thousands of them. There was probably no time to lose, so I ignored it. 

Boxwood leaf miner

A few weeks later I saw the damage to the leaves. They were wrinkling up and turning color. I split one leaf open, and inside were tiny orange maggots, from two to six in every leaf I checked. Now that I could see the little orange bastards, it pushed me into action. I asked google how to deal with them without resorting to pesticides. Google said, "you must resort to pesticides". Particularly, a systemic insecticide that would be taken up by the plant's roots and distributed to the leaves. I applied the systemic, but I was afraid I ignored it too long. They were probably stuffed and pupating and turning into adults. 

Boxwood leaf miner

Two weeks later, my fears were confirmed. What looked like fat orange mosquitoes were flying in swarms around my boxwood, fornicating and laying eggs in the new leaves. The boxwood wouldn’t survive another generation of these Trump-colored vermin. But I was still loathe to use more insecticide. Hoover to the rescue. I took my vacuum cleaner out on the porch, and began vacuuming the mango scum, much to the dismay of my girlfriend who was awakened by the noise, and immediately questioned my sanity (not for the first or last time). To no avail, I explained my rationale about avoiding the use of insecticides that may harm beneficial insects. Verdict... I was a crazy person. I kept vacuuming. They just kept coming. After a while I went inside to take a nap. 

vacuum cleaner

I woke to the sound of a vacuum cleaner. Yes, outside was my girlfriend vacuuming boxwood. We were both obsessed. This went on for nearly two weeks. The neighbors were too polite or too scared to mention our obsession, but I doubt the boxwood would have survived another season without the intervention, and they look well on their way to recovery. I have to admit though, it was a lot of effort for a few lousy boxwood.

John Mollon

Social Distancing for plants

Social Distancing for... plants? Yes, you read that right.

Social distancing for plants has two distinct applications.

cedar apple rust on hosts

The first is to keep plants apart that simply don’t get along well. Examples include those affected by Cedar-Apple Rust such as crabs, hawthorn, and quince and their alternate hosts of Juniper (virginana, horizontalis, and scopulorum). The deciduous get orange spots on their leaves and early leaf droppage while junipers get galls. Similar to this is Pear Rust which affects our ornamental Asian Pears , Bradford, Cleveland, et al. This, too, is caused by over-planting and proximity to Juniper species. The results are similar to Cedar-Apple Rust. A more recent fungal problem exist with our boxwoods and pachysandra. While not alternating hosts, plantings of these as complementary may increase risk of Boxwood Blight. Some genera simply need some distance or even not being included in the same landscape altogether.

overgrown landscaping examples

The second application of plant distancing is proper spacing. This requires planning and knowledge of plant size, growth rates, and growth habit. The first crime in planting I would call the model home or interior-decorator syndrome. The landscape is planted for the here and now. It has to look lush and lived-in – NOW. The result in a few years is usually a crowded, jungle-like landscape. Much of the original plant material will need to be pulled out. The second crime is a planting that looks nice but really does not reflect the true growth habit of what has been incorporated into the landscape. Remember the Colorado Blue Spruce on the corner of the house; thirty years later you cannot see the house. The development of columnar trees and evergreens has solved this problem. Also, the introduction of many dwarf or compact versions of the old standby varieties has expanded the pool of variety and color palette. Only people my age remember the old Vanicek Weigela (a monster) that yielded to W. fl. ‘Red Prince.’ And now, we have Weigela florida: ‘Wine and Roses, Fine Wine, Dark Horse, My Monet, et al.’ How small can they get?

Weigela Red Prince

The art and discipline of plant spacing depends on a great knowledge of plant growth rate and maintainable size. If a new landscape is developing nicely in about three to five years, then you did a good job of placement. Larger trees and evergreens can take around three years to really establish. This is evidenced by greatly increased leaf size and improved coloring in evergreens. From this point on you should see an increase in growth rate. Most woody ornamentals are filling in and exhibit much heavier blooms during this same time. Perennials and groundcovers establish showing very little top growth first season – the Iceberg Effect (roots first, then foliage and flowering the next season).

We are at the mercy of tag information which is far from perfect and landscape architectural drawings rendered by an industry with low plant knowledge. If you take your landscape installation seriously and are interested in long-term results, become familiar with nursery varieties as fast as you can and keep up with new introductions.

Jeff Good

Just stop, and put the tarp on!

Mesh tarps

Welcome to summer! This time every year we find ourselves having the same conversation with lots of drivers picking up plant material.

This conversation revolves around putting a tarp over their load of plant material. There are two typical answers for this. “I forgot a tarp” or “I am only going a few miles.”

To be honest, we have a chuckle at both of these answers, and the reason for the chuckle is quite simple.

Tarped load leaving

In the case of “I forgot”, we generally know what most of the nursery tarp inventory for most of our customers looks like as we see them often. This also means we know how many tarps the company owns. My favorite “I forgot” comes from a good friend of mine. I sold him a new tarp multiple times when he forgot. And every time he was mad as he knew there were about twenty tarps sitting unused at his shop.

great tarp jobs

The latter, “I am only going a few miles”, is not so funny. During summer temperatures, damage to the foliage while driving down the road at 50 mph (or more) happens in just a few miles. So really, any driving with the plant material un-tarped will damage the plant.

We help you tarp

Here is the beg from Christensen’s. Please tarp everything when you leave our nursery. We will help you tarp your load!!

P.S. We will not accept anything as a return that left without a tarp on it.

Eric Joy

Transplanting broadleaved evergreens

Euonymus Emerald Gaiety

We enjoy seeing our broadleaved evergreens survive year after year in spite of being punished by our long, cold, icy Michigan winters, don’t we? Did you notice that I didn’t say snowy? It seems like we haven’t had much snow in the past few years, doesn't it? Whether it’s Rhododendron, Azalea, or Pieris, that fresh pop of color is a welcome sight each spring. Then you have your Hollies, Boxwood, Mahonia and some of the Euonymus. Euonyminians? Euonymi?

Ilex x meserveae

But even finicky broadleaved evergreens can outgrow an area that they’ve called home for many years. Which brings us to the title of the article:

Can you transplant broadleaved evergreens?

Yes. But a little extra care is needed to safely move them to their new home.

  • Do not transplant them in the heat of summer. Early spring and late summer into early fall is optimal for survival, when top growth slows but root growth is still active. Any nurseryman will tell you that transplanting broadleafs in the middle of July when it’s 90° plus for weeks is a death sentence. They may live, sure, but we will never recommend you doing it. Wait until late August – early September if at all possible.
Rhododendron PJM
  • These plants have very shallow, fibrous root systems. When digging, focus more on the width versus the depth. You’ll still need some depth, believe me, but I would recommend going as wide as the plant itself, and then add some more. Easily an extra third of the plant. Get some burlap to help support the root ball while you are transferring it.
Rhododendron Cunningham's White
  • After transplanting, apply Ferti-lome Root Stimulator and Plant Starter Solution. This product can reduce transplant shock and is safer to use than conventional fertilizers. You may also use a slow release fertilizer such as the organic Tone series (Plant Tone, Flower Tone, or Holly Tone) to help the healing process. You do not want to use any strong quick-release fertilizers at this time.
Fertilome and Plant Tone
  • Water, water, WATER! Water daily for at least two weeks, and please, for longer than one minute. Hit the foliage (not in the heat of the day), and especially soak the ground. Remember, they have shallow roots, so this will be absorbed quickly. Using a quality bark mulch is also a good idea.
Rhododendron Nova Zembla

Remember to site your broadleaved evergreen plants where they will be protected from winter sun such as the north or east side of a building or under a canopy of trees. Smaller-leaved specimens like boxwood are more forgiving when it comes to winter burn but know that it is a possibility in some situations.

David Reutter

Talking to your plants in Quarantine

Clivia

If you’re anything like me, this Michigan shelter-in-place quarantine has been quite the eye-opening experience. While I happen to be very introverted by nature, the lack of human connection during this time has me going a bit stir crazy. At random points in the day I find myself talking to the various plants sprinkled around my apartment. The conversations are a little one-sided, but they got me thinking: does talking to your plants benefit them or you? 

Happy houseplants

Scientific evidence on this particular subject is somewhat sparse. Although this is not a new theory (Many believe the first mention of this particular ideology is “Nanna oder über das Seelenleben der Pflanzen” by Gustav Fechner) few actual studies have been conducted. In Fechner’s 1848 book, he puts forward the idea that plants have a soul of sorts. Although his premise was founded mostly on his own feelings and observations, it has become the basis for the few studies that exist today. A 2008 study from the National Institute of Agricultural Biotechnology, Rural Development Administration “identified a set of sound-responsive genes in plants” (1). The study suggests that both genes are responsive to sounds above 125Hz. The typical adult male has a vocal frequency between 85Hz and 180Hz, while the typical adult female has a vocal frequency between 165Hz and 255Hz. Sorry guys, women are just better when it comes to plants! A separate study published in the Journal of Experimental Botany found a link between sound vibrations and several outcomes including: “increase the yields of several crops and strengthen plant immunity against pathogens. These vibrations can also prime the plants so as to make them more tolerant to impending drought.” (2).

Kalanchoe luciae 'Fantastic'

While there may not a ton of hard scientific data related to the effect of speech on plants, there is quite a bit of anecdotal evidence! On a 2004 Episode of Mythbusters, seven separate greenhouses were set up with varying levels of noise. Stereos playing loops of speech were set up in the greenhouses; Two of negative speech, two of positive speech, a fifth with classical music and a sixth with intense death metal music. A seventh greenhouse, used as a control sample, had no stereo. The control group grew the least out of the seven after 2 months.

Sansevaria

Possibly one of the saddest commercials I’ve seen in recent years (with the exception of the ASPCA ads. The song gets me every time.) is a viral video (3) produced by IKEA last year. It was intended to show the effect of unkind words on children. In the experiment, two plants were isolated in identical, controlled environments and received either positive or negative comments through a speaker. After 30 days, the plant that received negative comments was visibly less healthy. Now obviously this wasn’t a strictly scientific experiment, it was an awareness campaign. It’s entirely possible that there were, lets just say ...outside factors... contributing to that poor plants’ demise. I sincerely hope not, because intentionally killing a plant seems a bit over the top for an ad campaign but this is the world we live in.

Schlumbergera cactus

Here’s my takeaway: until someone initiates a large scale scientific experiment, we can’t conclude that talking to your plants absolutely will or will not help them grow. Really though, what could it hurt? The worst thing that could happen is people could conclude you’ve gone a bit mad. The Mad Hatter said it best “You’re entirely bonkers! but I’ll tell you a secret: all the best people are.” 

Phalenopsis orchid

1.) Jeong, M., Shim, C., Lee, , J. et al. Plant gene responses to frequency-specific sound signals. Mol Breeding 21, 217–226 (2008). https://doi.org/10.1007/s11032-007-9122-x

2.) Ratnesh Chandra Mishra, Ritesh Ghosh, Hanhong Bae, Plant acoustics: in the search of a sound mechanism for sound signaling in plants, Journal of Experimental Botany, Volume 67, Issue 15, August 2016, PaMad ges 4483–4494,

3.) Bully A Plant (IKEA) on YouTube

MaKenna Harwood

Vertical mulching

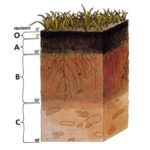
Soil structure

One of the biggest hurdles for planting in the urban environment is soil compaction. Heavy equipment used during the building process, or for mowing and landscaping, can cause the soil to become so compacted as to not allow roots to spread, not allow water to be absorbed or drain away, deprive the plant of oxygen in the root zone, and subsequently not allow nutrient absorption. Even foot traffic causes significant compaction. Some of the largest trees in the world have been killed by the foot traffic of people coming to see the tree, and steps have to be taken to protect them. When your dog runs the same path over and over the grass doesn’t grow due to compaction, and even animals as small as squirrels and chipmunks can make tiny trails where plants don’t grow.

compacted soil

The effects of soil compaction

One of the best methods of addressing soil compaction is a process called vertical mulching. It’s a form of aerating similar to the plugs pulled out by lawn aerating, just on a bigger scale. It’s done by drilling holes, ideally with a two inch diameter auger (something heavy duty) in a grid pattern with the holes 2 feet apart and up to two feet deep. Obviously call Miss Dig to locate utilities (248-370-6400 or 800-482-7171), and be prepared to do some irrigation repairs if necessary.

This is how it helps. Immediately it allows oxygen, water, and added nutrients access to the plants root zone. This is just the beginning of a long lasting process. In the winter, water freezes in the holes and expands causing the soil to fracture. These fractures in turn fill with water, freeze, expand, and cause further fracturing. The more this happens, the more oxygen and water are available in the root zone. The longer the holes can be kept open, the longer the process will go on. They can be kept open by adding aggregate or using soil aeration tubes (see photo). The tubes may not be cost effective for large areas, but they are better than aggregate as they leave the hole completely open to allow more water and air to reach the root zone. Also, they are capped against debris filling them up and can be uncapped to add nutrients. Eventually roots will render them useless, but by then they will have done their job.

Soil aeration tubes

As far as drilling the holes, you can do it manually using the biggest electric drill you can find. I rented one once that had two handles like a jackhammer with the trigger in one of the handles. A posthole digger on a tractor or other piece of equipment would work well for large areas.

For lawn aeration, pulling plugs is an excellent option for lawn health (note: this should be done when the ground is moist so the plug can be cleanly removed), but for landscape beds vertical mulching is the best method to properly aerate, and if done manually can be done in established beds. Using this method you can overcome the hurdle of soil compaction and your plants will thank you for it by growing big and beautiful.

Lawn aeration
John Mollon

Raising Monarch butterflies

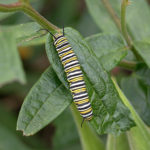
Monarch caterpillar

It’s not always all grinding and going at Christensen’s Plant Center, sometimes we crew members get to stop and smell the flowers - and during the summer - find some of them crawling with beautiful monarch caterpillars.

Monarchs are not yet an endangered species, but they and their migration are being threatened and need protecting. So at Christensen’s we started rounding up our Monarch caterpillars and putting them into mesh butterfly cages with a milkweed plant for food. Monarchs feed solely on Asclepias, using the toxins in the milkweed to make themselves very unpleasant to predators. Animals and birds who eat a Monarch caterpillar or butterfly get pretty sick from it and won't eat another. There are still a lot of losses, though, so raising and releasing them really helps boost their numbers.

Monarch caterpillars
Monarch caterpillar
Monarch caterpillar

They are voracious feeders, so we check them daily, replacing the host plant as needed. Once they’re nice and fat, they’ll eventually J-up (they hang, head down, in a ‘J’ shape) and morph into a chrysalis within hours. Then after about 10 days, you’ll have a beautiful Monarch butterfly. Easy, right? One day when we came into work, we had three hatched and ready to take off!

Monarch chrysalides
monarch chrysalides

Chrysalides start out green, turning clear as the butterfly develops

emergent male Monarch

Male Monarch emerging from his chrysalis

Be careful of escapees though - we had one little guy escape and he ended up morphing into his chrysalis under the table. If you have a cage with a zipper, make sure there’s no one by it when you unzip it or a caterpillar could get caught in it (yes, sadly we learned that one from personal experience). Also beware of invaders: spiders and flies love to sneak in which can be dangerous for the butterflies-in-training! Other predators include wasps, assassin bugs, ants, toads, and even mice.

Monarch caterpillar

Plants like Allium, Buddleia, and Liatris seem to be swarming with Monarch butterflies this time of year. Monarchs are an important pollinator for many wildflowers. Providing a safe place for Monarchs to grow and multiply is a rewarding and beautiful experience.

See here for more about growing milkweed: Milkweed for Monarchs - Michigan DNR

male and female adults

Fresh new Monarchs! Female (above) and male (below). Males have a tiny spot on their hind wings.

Monarch adult

Common milkweed is a favored host plant for Monarchs

Aubree Stamper

What’s that in our pots? Rice?

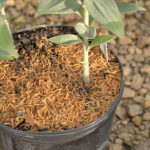
Rice hulls on lilium

You may nave noticed something different in our perennial pots recently. Covering the soil of some of the varieties we grow are tiny rice hulls. Sounds delicious, right? No, it's not the starchy side dish.

Rice hulls are a sustainable soil amendment with many advantages. Here at Christensen’s Plant Center rice hulls are used mostly as a top dress to prevent weeds. Our perennial production department applies them at the time of potting. Used properly, they can help control a weed problem before it even begins. If you can manage to get more rice hulls in the pot than on your person, these can be very effective.

Rice hulls

Rice hulls can also be used in the landscape. Mixed into the top 6-12” of your garden or planting beds, the advantages include better drainage, water holding capacity, and soil aeration. And for all of you environmentalists out there, rice hulls are 100% organic and biodegradable.

As a top dress, rice hulls are great for holding moisture and preventing weeds, but there are a few downsides. THOSE THINGS ARE A MESS! Once you open up the bale, you will find it in every pocket and every shoe of those around it. Also not the best thing to use on a windy day... We've found that the most effective plants to use it on have been hosta and daylily.

Rice hulls on hosta

Sometimes the rice hulls work a little TOO well. With plants that cannot handle a wet crown, rice hulls should not be used. Since rice hulls are to be applied ½-1” thick, that can be too much moisture. For plants like sedum, rice hulls are not recommended. 

Rice hulls on hemerocallis

Rice hulls are a cost effective, easy way to maintain plant moisture and keep away weeds. Just not the best to have for lunch. 

Molly Lutz

Weeds burning you up?

Flames

I have a problem. One the one hand, I have landscaping that I like to keep looking, well, ornamental. On the other hand, I prefer to avoid using herbicides and insecticides whenever possible. Now factor in the lack of gardening time that comes with working at a nursery and you can guess what my yard looks like by summer.

A lot of weeding can be avoided by keeping beds mulched, but what about driveways and paths? You can pull the weeds, if you can find the time to stay ahead of them. You can treat with herbicide, and depending on what product you choose, deal with too little - or too much - control. Or... you can do it the fun way - with a propane torch.

Editor's note: CPC is not endorsing this method. Use caution if you decide to try it.

Propane torch
Cooking the weeds

What I like about this method is the instant results and minimal regrowth that comes with superheating the ground, simultaneously cooking weed roots AND seeds lying in wait. The crackling flame as your enemy combusts is also quite satisfying. You'll want to do this on a windless day, to avoid getting into trouble with smoke or sparks.

It should be noted that this is a two-man job, one person running the torch and the other manning the hose. Thoroughly douse everything down after the torch passes so you don't accidentally burn down the neighborhood. I am not kidding about this.

  • Always stand with your back to desirable plantings. The HEAT is doing the killing and there can be a five-foot zone of death in front of your torch. (Don't ask me how I know this.) And look up - heat rises.
  • Use a board as a heat shield to protect the edges of beds or ornamental fencing. 
Heat barrier
  • Work slowly and methodically and watch the breeze. If it gets windy you must stop!
  • Water the ground the day before. You want green, short weeds, and seeds will cook better in moist ground. Do not use a torch on tall, dry weeds.
  • Hose down everything thoroughly as you go so nothing is left smoldering.
  • Be sure to have a spare, full tank in case you run out of propane before you finish your area.
  • Older, tougher weeds can re-sprout, go back in a week or two and re-treat.
  • Do not burn poison ivy - the smoke is toxic if inhaled.

The torch has an adjustment dial on the wand, you want to keep your flame just large enough to burn invisibly but not go out. As the pressure drops you can turn the dial to get more oomph. If your tank ices up stop and defrost it to get some pressure back.

Iced propane tank

This technique takes a little practice and is not for the faint of heart, but can't be beat for fast cleanups of driveways, paths, and paved areas. The torch shown is designed for clearing large areas, there are others on the market that have a smaller, more targeted flame.

Good for large areas
Holly Christensen