Plant care – Page 3 – Sticks & Stones

Archive

Category Archives for "Plant care"

Outstanding in our field

Irrigation emitter

Ever wonder how Christensen’s stores and maintains trees in "the field" to keep them viable all year long? If you've ever tried to keep above-ground material healthy over a long period of time you know there are challenges to be met. But for the most part, it’s really not that far off from what you do when you plant a tree in a landscape - except we do it for a few thousand trees.

First, we grade out the area where the trees are going to go and then auger holes to place the trees in. After the tree is straight in the hole we backfill it with dirt and lightly pack it down.

Augering tree holes
Augered tree hole

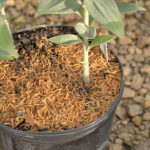
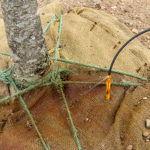
Then an irrigation emitter is placed into every root ball. We use two different sizes of irrigation emitters, yellow for trees that are 3” or smaller and black for anything larger. We do an irrigation check on the trees at least once a week depending on the time of year. The irrigation system for the field might run 24 hours a day in the summer, so making sure that the trees get the required amount of water is sometimes difficult. We check the emitters to make sure they are not clogged, that they are spraying correctly, and that they haven’t come off of the feeder line and are flooding the tree.

Irrigation emitter

After the trees are put in the ground we apply pre-emergent to prevent weeds from growing in the root balls and the surrounding soil. We generally do this twice a year. As the year goes on if weeds begin to grow we spray with non-selective herbicide. We add a non-toxic blue indicator dye to make sure that we are only hitting the targeted weeds and not the trees.

Trees in the field

We do several other sprays throughout the year to prevent disease or insect damage. For instance, we spray for apple scab in the early spring as the trees just start to leaf out. There's also a scheduled spray to prevent gypsy moth, when the temperature is right. We do other targeted sprays as issues come up. Our nursery is inspected regularly for pests so we can be sure that our material is ready for distribution.

Tree guards

At the end of the season we put tree guards on the trunks to prevent damage that could be caused by roaming rabbits and deer. In the spring we remove any guards that are made from solid material in order to allow the trunk of the tree to stay dry and also to prevent bugs from making a home there.

Reburlapping

Lastly, when we lift trees from the field to go on your truck, we carefully re-wrap the rootball with fresh burlap if needed. You can be confident that the trees we store are ready to go on your landscape job, spring, summer, or fall.

Trees in field
Chris Nielson

Plant reversions

Hydrangea Mariesii Variegata

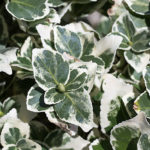
The first time I saw a plant reversion, I wasn’t sure what I was looking at. A customer had called and said there was a TREE growing out of her Dwarf Alberta Spruce. I had never seen this before, so I had to get my Dad involved. He said it was a classic! One of the buds one year cast off the dwarfing gene and the regular white spruce began to grow instead. I have to admit it was pretty cool looking - the white spruce growing straight and tall - but the customer wasn’t thrilled. The reversion is always more vigorous and would eventually take over the plant if not addressed.

Reverted Dwarf Alberta Spruce

Dwarf Alberta Spruce with reverting growth

Many of the most interesting and unique plants in the trade come from a spontaneous mutation, like a witch's broom or a variegated sprout. The mutation is discovered, a cutting is taken, and the variety eventually propagated and introduced. Some of these mutations aren’t that stable, and you will see parts of or entire plants reverting to the original form. I would like to point out that this is different than when the rootstock takes over a grafted plant, in that case you can see the growth is coming from below the graft.

Weigela My Monet reverting

Weigela 'My Monet' losing the variegation on a few branches

Reversion can be brought on by many factors, but environmental stress seems to be a common cause. If you are observant when you are out on landscapes, you can see reversions all the time. That spruce example happens now and again, and loss of variegation is another one that’s fairly easy to find.

Variegated dogwood reverting

Cornus alba 'Elegantissima' going green

So getting back to my “Classic” scenario, my Dad suggested to our customer that we should prune it out immediately, as it was only going to get worse. There was a good chance the plant would survive and eventually fill in around the removed portion. If we didn’t, the reversion would dominate, and the resulting tree was never going to be an attractive specimen. I’m a tree hugger and my Dad’s even worse so of course we recommended trying to save the tree. In the end, we replaced the plant - because of its location and visibility the recovery time was unacceptable.

Hydrangea Mariesii Variegata

Hydrangea macrophylla 'Mariesii Variegata' not playing nice

Each case is a judgement call. If you catch it while the reverted growth is fairly small, a simple pruning may be sufficient to eliminate it. Perennials such as hosta can be dug up, split, and replanted.

Hosta Christmas Tree

Hosta 'Christmas Tree' not so festive

So be on the lookout for reversions. They are kind of cool, sometimes a little weird but definitely more common than you think. Take some pictures, share with us what you are finding and I will pull together a follow up discussion on this topic. Remember: Prune out all you can to “nip it in the bud” - if it’s too late replace it - and get a picture for our discussion.

Clint Rasch

Landscape challenge: Dry Shade

Ajuga

Selecting plants that can grow under dry conditions can be challenging. Selecting plants that can grow in the shade can be challenging as well. Finding plants that can grow well under both conditions? Well, that narrows your plant selection down a bit, but there may be more options than you think.

It must be realized that even though a plant is considered drought tolerant, this is only the case once their root systems are firmly established. Until that point, they must be watered regularly. This could take up to a year or more of effort before you can cut back on the watering, but during extended droughts, even established plants need a little help to survive. Using mulch will help by retaining water that is provided by you or mother nature.

Also, there is a difference between shade loving and shade tolerant plants. Some plants that grow well in full sun can tolerate shade, but they will be a bit thin and wispy and not blossom as much. If these plants are to survive, all of their other needs must be met to compensate for the lack of sun.

Hydrangea quercifolia

Oakleaf Hydrangea

I will start with shade tolerant varieties. The one selection which, can in some cases, be considered a small tree, is hamamelis (witch hazel). Shrubs include buxus (boxwood), taxus (yew), aronia (chokeberry), and diervilla (bush honeysuckle). Hydrangea quercifolia (oakleaf hydrangea) are surprisingly drought tolerant once established, and of all the shrubs mentioned will tolerate the shade best as they are considered shade loving.

Painted Fern

Painted Fern

Shade tolerant perennials include campanula (bellflower), hemerocallis (daylily, especially stella d’oro), digitalis (foxglove), geranium sanguineum (cranesbill), liriope (lilyturf), euphorbia (spurge), and phlox subulata (creeping phlox).

Bergenia

Bergenia

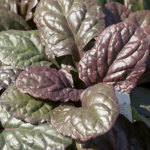
You may have better luck with these shade loving varieties. Hosta (plantain lily), ajuga (bugleweed), pachysandra (spurge), vinca (myrtle or periwinkle), tiarella and huecherella (foamflower), hellebore (lenten rose), brunnera (bugloss), lamium (dead nettle), athyrium niponicum (painted fern), and bergenia (pigsqeak).

Ajuga

Ajuga

It may be difficult to plant a shady dry area, but if you put the time in to make sure the plants will be healthy and establish a good root system, I think you’ll do fine. It’s not the biggest plant list, and may not cover every possible candidate. Hopefully you don’t also have deer around making the list even smaller (as well as your hostas).

Hosta

Hosta

John Mollon

Sunbathing hosta?

Hosta 'So Sweet'

Of all the questions I get about growing hosta the most common one is: which varieties will take sun - and how much sun is too much sun? Many shaded areas get SOME sun and choosing the right varieties for the conditions will be the difference between success and...

Maybe we won't talk about that.

All hostas prefer to have morning sun and maybe some late afternoon sun. It is that midday sun that is the challenge. Sun tolerance, is to some degree, leaf-color related.

Hosta 'Guacamole'

Hosta 'Guacamole'

Most hosta with whitish variegation will burn in hot afternoon sun. Those that have more green to chartreuse variegation will handle some of that midday sun as long as they are getting plenty of water. You should avoid putting blue hosta in the sun as the blue color is a waxy coating on the leaf and will melt off, turning your blue plants green. Golden hosta WANT sun. If they don’t get enough sunlight they will turn that sickly greenish-yellow chartreuse color. You know the one. Green hosta will typically take some midday sun, and I have found that the thicker the leaf the more sun they will take.

Hosta 'Vulcan'

Hosta 'Vulcan'

Do you have a shady area that merges into a more sunny area and looking for some continuity? Here is a list of sun-loving hostas to fill in the sunny areas. Remember, soil moisture is key to keeping the plants looking good.

'August Moon'Golden, medium to big size
'Avocado'Green with light green center, big size
'Fragrant Bouquet'Green with chartreuse edge, big size
'Francee'Green with white edge, medium size
'Ginko Craig'Small green with white edge, groundcover
'Gold Standard'Gold with green edge, medium to big size
'Guacamole'Light green with dark green edge, big size
'June'Gold with green edge and streaking, big size
'Paradigm'Gold with wide green edge, medium size
'Patriot'Green with white edge, medium size
'Paul's Glory'Gold with green edge and streaking, big size
'Prairie Moon'Gold, big size
'Royal Standard 'Solid green, medium size
'So Sweet'Green with cream edge, medium size
'Spartacus'Green with rippled gold edge, medium to big size
'Sum and Substance 'Lime-green, very big size size
'Vulcan'White with green edge, medium size
Hosta 'June' and 'Francee'

Hosta  'June' (L) and 'Francee' (R)

Hosta "Patriot'

Hosta 'Patriot'

Kim Roth

Disbudding Rhododendrons

Rhody snapping bud

Rhododendrons are considered among the more difficult plants to trim. Many sources of information about pruning Rhododendron come from the Southern and Western states. The usual complaint about Rhododendron is that they get too large. That is not a big problem in the Midwest.

"Disbudding" refers to two aspects of pruning Rhododendrons. The first is simply removing spent blossoms. I’ve heard arguments over the years that, unless removed, the old flowerbuds will inhibit production of new flowers. I found absolutely no reference to this in my research travels. Also, to me this makes no sense. Mother nature put those flowers there and she can take them off – the shrub will bloom again! The best reason to remove them is one of aesthetics.

Rhody post-bloom

New growth comes from just below the flowers

The second aspect of disbudding is pruning a Rhododendron for shape, compactness, and size of planting area allowed. Most pruning recommendations include removing dead or damaged branches as well as removing branches along the ground. These danglers can be more easily affected by fungus and can be a highway for weevils.

Disbudding a rhody

Grab spent flower at the base and gently bend the stem until it parts

Now for the tough part – pruning a Rhododendron for shape and size. In essence, any pruning one does is shortening the distance between growth years. You can prune the current year’s growth back by hand right after blooming when the new growth is sticky or by mid-June with pruners when new growth has hardened off a bit. Pruning deeper on bare wood does not usually give good results. That limb will often die back or result in new shoots that may be spindly. One aside is my own observation that some of the newer grafted Rhododendrons are producing growth buds on low, woody branches which may develop if apical branches are damaged or removed.

Rhody deadheaded

Old flower removed leaving new growth which can be trimmed if desired

Rhododendrons also include PJM types and Azaleas - both evergreen (kaempferi) and deciduous (Exbury and Northern Lights series). Most of the pruning rules are the same, however, you can prune much deeper into secondary wood and even lightly shear with good results. Compactness for shape is encouraged but avoid the meatball-effect. Also, hard pruning can reduce respiration and recovery.

Rhododendron Cunningham's White

Pruning aside, the best results for Rhododendron will be had from good soil preparation (i.e. moist, well-drained conditions), the addition of organic matter, and application of acid fertilizers.

Jeff Good

Boxwood blight update

Winter damaged boxwood

Boxwood blight is a fungal disease of boxwood that results in the defoliation and decline of boxwood plants. Once it’s in the landscape it is very costly and difficult to control with fungicides. The boxwood blight fungus has a short life cycle and infections can spread quickly between plants, especially under humid, warm and wet conditions that favor disease development.

The main way that this disease is spread is through the movement of infected plants, cuttings, and boxwood debris. The sticky fungus spores are also spread on contaminated tools and equipment, worker's clothes, and water. The spores are unlikely to travel long distances through the wind. All plants infected with the fungus should be destroyed, as the chance of further spreading the fungus is highly probable. Limiting the spread of this sticky fungus is very difficult and can only be accomplished by following good sanitation practices.

Green Velvet Boxwood

Boxwood blight has been found in Michigan. Because of this we will NOT accept any returns on boxwood once they have left the nursery. We will also ask that you do not bring any boxwood plants, leaf litter, or clippings into our nursery. We reserve the right to not load any vehicle that has boxwood or debris from outside of our nursery. Please do not bring in any samples of boxwood that you are trying to match - take several pictures of the plant you are trying to match and we will help the best we can.

Boxwood blight can look like many other issues that boxwood can have, such as leaf spot, winter burn, and other non-threatening fungal diseases. This means that:

The only way to confirm whether a plant has boxwood blight is to submit samples to a professional plant disease diagnostic lab.

Winter damaged boxwood

NOT Boxwood Blight -  this is winter damage.

Cooperative extension agents will be able to help you in submitting samples if you need help. Affected branches, stems, and leaves make the best samples, don’t forget to also take pictures.

If you do suspect that a plant has boxwood blight, you can send a sample to MSU Diagnostic Services. You can contact them at http://www.pestid.msu.edu/ or through the Michigan Department of Agriculture.

More information and pictures here: Boxwood Blight

Chris Nielson

Stones or mulch in your landscape beds?

You’ve just installed your plant material and now it’s time to decide which material to use to cover the soil. The two most common materials are mulch and stone. Aesthetic preferences aside, here are some pros and cons for each.

We’ll start with stone. Starting with the pros, stone does not break down and need replacing. Also, you have few issues with weeds initially due to the use of weed barrier fabric. One of the problems with stone is that it is much more expensive to install, though some would argue that the upfront costs are offset by the fact that it doesn’t have to be replaced annually.

The primary issues are maintenance. Though weed barrier is effective in the short term, eventually a layer of dust and plant material create a medium on top of the fabric that weeds can and will grow in. This can be mitigated somewhat by careful cleaning of the beds (the heavier the stone the better for cleaning), but eventually weeds will become a real problem.

Physically removing weeds is difficult. Chemical removal is an option, but then you still have to struggle to remove them once they’ve died. Also, stone does not benefit the landscape planting in any way, and though weed barrier fabric is designed to allow water to get through, if there is any kind of slope, more water will run off than soak in compared to not using it. Over time the fabric may degrade or show through, then you can have a real mess.

Also, stone in a sunny location can get uncomfortably hot for some plants. Adding or removing plants, as well as working on irrigation, becomes more difficult in a stone bed. For many though, the aesthetic value is worth any complications.

With mulch, I will start with the cons. It does have to be replaced as it breaks down. If you replace it yearly for aesthetic reasons, the old mulch might need to be removed to prevent a harmful build up. We've all seen towering cones of much piled against tree trunks, and it is not a good thing.

If you wait for it decompose sufficiently, removal of the old mulch may not be necessary. Mulch is also susceptible to more weed growth initially than stone, though the weeds are easier to remove physically. Mulch can become matted as the season progresses causing some water runoff, but a quick fluffing or cultivating of the mulch will break up mats to restore proper absorption. The best thing about mulch is its benefit to the plant material.

Mulch is good for water retention in the soil, provided there’s enough water to permeate the mulch in the first place. Mulch also provides a good environment for beneficial insects, fungi, and microbes in the soil. Some amount of nutrients are also made available to the plants as the mulch decomposes. Mulch also provides insulation for plant roots that is effective in hot and cold conditions.

Badly degraded landscape fabric around a street tree.

It is a waste of money to use weed barrier fabric under mulch as you are defeating the purpose by immediately placing a medium in which weeds can grow on top of it.

Here's a quick recap of the pros and cons of each material:

Pros, Stone

  • Does not break down
  • Does not need to be replaced
  • Can use landscape fabric underneath

Cons, Stone

  • More expensive initially
  • Weeds harder to control and remove
  • Does not benefit plants
  • Can be too hot for some plants
  • Landscape fabric can inhibit water penetration
  • Landscape fabric can degrade
  • Needs periodic cleaning of debris

Pros, Mulch

  • Weeds easy to remove
  • Easy to fluff and refresh
  • Helps retain soil moisture
  • Provides environment for beneficial soil organisms
  • Feeds plants as it breaks down
  • Insulates roots from weather extremes

Cons, Mulch

  • Needs to be replaced or refreshed
  • Can be piled too deep for the health of plants in the beds
  • Weeds may grow easily
  • Can mat down

Stone or mulch? The final decision I leave to you.

John Mollon

It’s time for a new (rose) style!

cutting hair

For those of you who don’t know, I have been a hairdresser for almost 35 years (...yes, I started VERY young). With the clientele I still maintain, spring is the time of year my customers want "a little more off the top". It's the time of year temperatures change and HUMIDITY can alter the decision of a new spring 'do. It’s kind of the same with my roses! 

Here at CPC, and for you and your customers, spring is the best time for cleaning up, shearing up, and shaping up your roses. After the snow is gone but before new leaves start to pop, it's the perfect time to give these beauties a bit of attention for top performance. While we are all looking forward to color and growth in our landscape, nothing holds court like a well-maintained rose bush.

Pink Knock Out Rose

Pink Knock Out® rose, ready for spring

Just as I cut off fried hair and split ends while styling my clients, when cleaning up roses I begin by removing last year's old leaves from on and around the plants. This reduces pests or disease carried over from last season. You'll want to cut back dead wood, broken or crossing branches, and anything smaller than a straw. It might seem like giving a pixie cut when you're going for long layers, but clearing out all this extra branching allows for better airflow - and airflow is key for keeping rose foliage healthy.  When trimming the remaining branches, cutting above outward facing buds directs the growth upward and outward for a more optimal vase-shaped form.

Pink Knock Out Rose

Pink Knock Out® 

Knock Out® roses are considered a shrub rose and self-cleaning. However, they still benefit from a nice cleanup in the spring, especially after they've had a few years in the ground. I like to take them down to about 12-18". They are such vigorous growers that, if you don't show them who's boss, you'll find yourself with a plant much larger than you intended.

Here's a happy climbing rose

Climbing roses are a little different. They have main, upright branches and lateral ones. The main branches should be left alone as much as possible. If cut, the plant will focus it’s energy on recovering height before pushing out lateral growth, which is where you'll get flowers. When pruning lateral branching there is no worry where to cut around the buds, anywhere will encourage a push of new growth and those desirable flowers.

So have no fear when considering your spring maintenance program. Sharpen those tools and get pruning! Oh, and don't forget your gloves.

Joanna Whitt

Avoiding replacements next season

Tree wrap

You’ll never really know your profits for this year until you finish your replacements next year! Winter protection can help reduce these.  Although we don’t mind selling you replacement plants, we do want your business to be as successful as possible

Three common practices we have covered in previous articles are applying Wilt Pruf on your broadleaf evergreens, putting up burlap screens as barriers to salt and wind, and using bark protectors to prevent deer and rabbit damage. There are two other recommendations I can give you.

frost crack

Preventing frost cracks. Previous minor wounds, scuffs or scrapes on a tree trunk even when healed react differently to expansion and contraction from freezing and thawing repeatedly during the winter. The wood can split right open, sometimes with a sound like a rifle shot. This commonly happens on the sunny south or west side of the tree. One way to prevent this is to apply tree wrap each fall. This is a 4” wide waterproof, crinkled paper that you wrap around the trunks of young, thin-barked trees to protect from both sunscald and moisture loss. The death of the sap-carrying tissue from cracks or cankers can cause a surprising amount of damage higher up the tree. The tree wrap should be removed in the spring.

Provide adequate moisture. You may say “The plant has lost its leaves, why do I still need to water?” You may not realize that the optimum time for roots to grow is the fall season, right up until the ground freezes, which in some years is not until January. We often get rain this time of year but newly planted trees often need supplemental watering while they are replacing roots lost from being moved. 

Even during winter months plant roots continue to replace moisture lost to drying winds and sun. Evergreens, both needled and broadleaved are particularly vulnerable. Plants that take up enough water will have the best chance to survive our winters and be ready for the spring push. 

So water well, and mulch those beds to prevent desiccation during those below freezing weeks and hopefully your landscape jobs will look as good in the spring as they did when you installed them.

Does Frost Really Crack Trees? by Michael Snyder​​​

Dan Alessandrini

Non-Fall Hazard shade trees

Acer Autumn Blaze

It’s almost that time of year for digging trees. There are some risks when it comes to fall digging season and you might be wondering what those risks are and what is safe to dig.

When handled correctly, many trees can be safely moved in the fall; however we have a list of trees that are considered poor candidates.

Christensen's Plant Center Fall Digging Hazard Trees​​​

For instance, if a freshly-dug tree is slow at regenerating roots or lacks new established roots, that tree could be considered high risk. Thin-barked twiggy trees like birch and willow are also at high risk due to having trouble retaining moisture during the winter months. Fall planted trees of any species still require water going into the winter and many losses can be blamed on the tree drying out.

Acer Autumn Blaze

Even though Red maple is on the Fall Hazard list, the Freeman Maple hybrids (Acer x freemanii ) like Autumn Blaze® (‘Jeffersred’) are not considered a poor risk. Being a cross between silver and red maple, they are tough, fast growing, adaptable trees. They are drought tolerant when established and hardy to Zone 3, making them good candidates for fall digging. Norway (Acer platanoides) and Sugar (Acer saccharum) maple also tend to move well in the fall.

Ginkgo biloba

Some others to consider are Ginkgo and ‘Ivory Silk’ Tree Lilac (Syringa reticulata) - even though that last is not technically a shade tree we do see demand for them in landscapes where space is at a premium.

Any of our knowledgeable staff would be happy to help answer questions or give you the most suitable substitutions regarding fall hazard trees.

Visit these links for more information about Fall Hazard trees:

Fall Hazard tree lists explained (Sticks & Stones, Jeff Good)

Transplanting and a Deeper Look at “Fall Hazards” (NYC Parks Director of Street Tree Planting Matthew Stephens and Taking Root Editor Michelle Sutton)

Fall Fiesta Sugar Maple
Luke Joerin